Mennonite Girls Can Cook is a collection of recipes which were posted daily for a period of ten years from 2008 to 2018. We have over 3,000 delicious recipes that we invite you to try. The recipes can be accessed in our recipe file by category or you can use the search engine.

Recipe Search

Honey Raisin Bran Muffins


This is a recipe from the Kellogg's page and the reason I chose to do this recipe is because it's easy and I don't keep bran in my cupboard. We enjoy this cereal and usually have a box of it in the cupboard. All the rest of the ingredients are always in my pantry. There are a few other scratch recipes for bran muffins on our blog if you prefer using your own bran. 

Ingredients:
  • 1 3/4 cups all-purpose flour
  • 1 tablespoon baking powder
  • 1/4 teaspoon salt
  • 2 tablespoons sugar
  • 2 1/2 cups Kellogg's Raisin Bran® cereal
  • 1 1/4 cups fat-free milk, I used 2%.
  • 1/3 cup honey
  • 1/4 cup vegetable oil
  • 1 egg
 Method:
1. Preheat oven to 400 degrees.
2. Stir together flour, baking powder, salt and sugar. Set aside.
3. In large mixing bowl, combine Kellog's Raisin Bran cereal, milk and honey. Let stand 3 minutes or until cereal softens.
4. Add egg and oil. Beat well.
5. Add flour mixture, stirring only until combined.
6. Portion batter evenly into twelve 2 1/2-inch muffin-pan cups coated with cooking spray, or use muffin paper liners.
7. Bake at 400° F for 20 minutes or until lightly browned. Serve warm.

Serves 6-12

Bread for the Journey


Psalm 113:3 NIV "From the rising of the sun to the place where it sets, the name of the Lord is to be praised."

It's a new day. Things look darkest at night but when dawn breaks and the sun rises we are filled with new hope and an opportunity for a fresh start to another day.
This is the perfect time of peace and quiet to commune with God. No matter what time of day let's take the time to praise our Lord and worship Him.

Kathy's Kitchen Revovation


This year Scot and I have gone through many changes.

With much thought, we put our home of 14 years up for sale.  We found a lovely little spot in a gated community, much smaller than our existing one, and also in need of some TLC. Once we made the decision there was no turning back. We began to make plans and the first day we got the key I picked up the sledge hammer and put the first blow through the wall. Renovations had begun. I'm going to give you a peek into what our summer and fall have looked like.

Outside our kitchen and living room windows, we overlook a small man-made lake with fountains, a gazebo, and gardens. It's beautiful and peaceful.


The wall I'm smashing is behind the cabinets on the right. This was the kitchen when we took possession of the house.
Notice the blue carpet on the deck? It's now been removed as well, and in the spring we will start on the outside.


Another look into the original kitchen.


The cabinets were all in good shape and could have been refaced or just painted but with taking out a wall, all these cabinets have now found a new home in the garage.


Scot and his friends Ron and John began the work of pulling out all the cabinets which now are hanging in the garage. Scot's dad was a wonderful support and help. He pulled many staples from underlay in the bedrooms of the house.


It was mid-June and renovations were well under way. We love open concept living so the wall between the kitchen and living room had to come down.


Our new home is just across the little lake from mom and dad. They treated us to many a wonderful supper while we were renovating. We can't begin to thank mom and dad for all their kindness.


While we were still in our old home I would bake treats to bring to the workers and we began to make memories on the deck....that still was adorned with flower pots filled with plastic flowers...planted with love I'm sure.


July 15 we took the final walk through our home filled with many wonderful memories that we have taken with us. During this season I was also caring for my dear dad who was in his last days. On this particular day, I was thankful that I had been organized.

The need to be with my dad was much more important than the move and Scot was very supportive to have the movers come and he gave direction without me there. This was the last photo I took of our last home and came home that evening to a new to us home. We had no kitchen, but we had a roof, a bed set up and a clean bathroom. We were thankful amid the mess of renovations.


I came 'home' to a kitchen with a sink! The old sink from the laundry room that was also getting a makeover. I bleached that old sink and it was more than many people have. I was thankful for running water.

The sunshine ceiling and other kitchen lighting came out and we put in LED pot lights.
Scot had to grind off a few layers of flooring in the kitchen and the guys put in a new sub floor. We chose vinyl planking throughout the main living area. A great choice!


The guys worked hard and trades came and went. Throughout the rest of the house I was pulling off a whole lot of wall paper and it was fun when people would just show up and help. We also spent a lot of time running around and choosing the flooring, paint, cabinetry and all things for the renovation. Cabinets were ordered but with it being a busy season we would have to wait, and so this is what our kitchen looked liked for a while.


It was summer so we BBQ'd many nights. Inside we had a toaster oven, toaster, microwave, and coffee maker.

My dear dad passed away during this time and my sister and her husband stayed with us in the midst of our renovations. They were good sports and we had such a wonderful time in our make shift kitchen. Our kids and grand kids from out of town also came and stayed across the lake from us at mom and dad's. It was fun to have them join us for muffins on the deck morning after the memorial service. Memories being made.


I had packed all our utensils, kitchen gadgets and kitchen linen in large rubber maids. It kept everything neat and tidy, clean and accessible.


Family times still needed to happen so we set up little make shift baking stations as needed. Here's 'B' helping me roll our Rollkuchen.


And....a camping trip with these two grand boys and their parents was a wonderful get a way. I never appreciated our RV kitchen so much, with running water and an oven and dishes in their right place. Having just lost my dad being with our kids and grand kids was just the medicine we needed. Family love and support...treasured.


Soon after we got home the call came that the cabinets were ready for install. This meant my laundry tub sink had to come out.....so how long would I be without water in the kitchen?
First...the lowers and the island were installed.

Wall colour: Benjamin Moore, Edge Comb Grey
Trim: Benjamin Moore, Cloud White
Cabinets: Benjamin Moore Cloud White


The kitchen really began to take shape when the upper cabinets were hung.


The appliances arrived. Until this point we were using the original fridge that had been moved into the garage and also had a small bar fridge under the covered deck right outside the kitchen door.


The counter tops were still on order so my clever hubby mounted some temporary plywood counter tops to a few sections and on the island. Worked like a charm!

Now we had counter tops...but was without running water in the kitchen for a few weeks. We filled little plastic tubs with water from the bathrooms and washed our dishes on the island.


We wanted to celebrate Scot's mom and dad's anniversary so we invited a few family friends and I bought pretty plastic square plates (so we would not have so many dishes to wash by hand) and Scot got his Big Green Eggs going and grilled us up a feast of steak and lobster and twice stuffed baked potatoes.

We were making more memories in our new home.


The appliances began to get moved into place. The stove was kept covered to make sure it was not damaged.

Under cabinet flush mount LED lights were installed.
(We went with all Whirlpool Appliances in the kitchen.)


And then the quartz counter tops arrived. Oh, how they shone and oh how I smiled!
I had a sink, and a faucet, and was now waiting for the plumber to return to hook everything up.

Counter top: Matrix Grey Quartzform


The Friday before Canadian Thanksgiving the back splash was being installed.
We had 12 around the table for Thanksgiving dinner.

Back splash: Ames 5x7 Centro Pearl Gloss


Welcome to my new happy place.


It's here in this sweet little home on a little lake we are making new memories to add to the old.

I look forward to filling the house with wonderful smells from the kitchen. The joy of family and friends to gather round the island and the big table just around the corner from the kitchen.
In spring flower planters will be hung and summer blooms will peek in through the corner windows.

The deck which is a wonderful covered extension to the kitchen will get 'dressed up' in spring too.

We've downsized from 2800 sq ft to 1700 sq ft.

It's cozy and we have not looked back.
Before we moved I decluttered and got rid of a lot of things from my kitchen. To my amazement, I have not missed one thing. I still have plenty of room for more than I need. When the old cabinets were moved to the garage I claimed the floor to ceiling pantry cabinet as my pantry for canned goods and large items.

(Kitchen complete, except for the window treatments that are being installed as I complete this post)


Hasselback Baked Apples


Hasselback apples are a fun twist of the classic apple crisp dish.  They are rather like apple pie without the crust! Firm and somewhat tart apples work best...varieties like Honeycrisp or Ambrosia.

  • 2 large crisp apples, peeled and cored
  • 1 tablespoon butter, melted
  • 1 tablespoon brown sugar
  • 1/2 teaspoon cinnamon
  • oatmeal crumble topping (recipe below)
  1. Pre-heat oven to 375°.
  2. Starting at the outer edge, make thin slices at 1/8"-1/4" intervals cutting most (but not all) of the way through each apple half.
  3. Place apple halves, cut side down, in an 8-inch square pan sprayed with cooking oil.
  4. Combine butter, sugar and cinnamon and brush evenly over each apple piece.
  5. Cover with foil and bake for 25 minutes.
  6. Uncover and bake for an additional 10 minutes.
  7. Remove from oven and spoon oatmeal crumble mixture over apples halves, carefully fanning open apple slices. 
  8. Return pan to oven and bake for an additional 10 minutes.
  9. Turn broiler to high and broil for one or two minutes.
  10. Serve warm with vanilla ice-cream and a drizzle of your favorite caramel sauce.
Crumble Topping:
  • 1/4 cup brown sugar
  • 1/4 cup old-fashioned oats
  • 1/4 cup flour
  • 1/4 teaspoon cinnamon 
  • 3 Tablespoons butter
Mix brown sugar, oats, flour and cinnamon.  Cut in the butter and use a pastry blender or hands to mix until crumbly.

*When making a fruit crisp, I always do a large batch of 'crumble topping' and keep it on hand in the freezer. Those frozen crumbs come in handy when making Hasselback apples.


Caramelized New Potatoes


I know new potatoes are usually a springtime treat.
 But lately, I've found small potatoes available almost year round.
 This is a quick way to gussie-up those little gems and turn them into something fabulous.

  • New potatoes - as many as you need for your guests - I usually count on 3 or 4 per person depending on the size.
  • 1-2 tablespoons butter
  • 1-2 tablespoons sugar
  1. Cook potatoes  in a couple of inches of salted water until barely tender.
  2. Drain water and return pan to heat.
  3. Add butter to pan and melt, tossing potatoes to coat well.
  4. Turn heat to medium and sprinkle with sugar.
  5. Continue to cook, tossing the potatoes in the pan every few minutes until the sugar melts and begins to form a golden brown crust on them.
  6. Serve with chopped fresh parsley if desired.


Pumpkin Cinnamon Rolls ~ No Knead and Dairy Free


Would you like a no knead recipe for fluffy and soft delicious pumpkin cinnamon rolls? Then this is the recipe for you. I adapted this recipe from Coleen's Recipes. Thank you Coleen. I have made the original recipe and this adapted one and they both turned out wonderful. I love that this dough with pumpkin is such a beautiful orange color.

Dough:
  • 1 cup coconut milk
  • 1 cup pumpkin puree
  • 1/2 cup vegetable oil
  • 1/2 cup sugar
  • 1 tablespoon instant yeast
  • 4 1/2 cups flour, divided
  • 1/2 teaspoon baking powder
  • 1/2 teaspoon baking soda
  • 1 1/2 teaspoon salt
Filling: (in a small bowl mix together first 3 ingredients)
  • 3/4 brown sugar
  • 3 teaspoons cinnamon
  • 1/8 teaspoon salt
  • 1 cup pecans, chopped ~ optional
  • 1/4 cup lactose free margarine, make sure it doesn't contain milk products
  1. In a medium sized microsafe bowl heat coconut milk, pumpkin puree, oil, and sugar just until warm not hot.
  2. Remove and stir in yeast. 
  3. Stir 4 cups of flour into the liquid mixture until well mixed. Dough will be sticky.
  4. Cover with plastic wrap and allow to rise in a warm place for an hour.
  5. In a small bowl, mix remaining 1/2 cup flour, baking powder, baking soda, and salt.
  6. Once dough has risen for an hour, stir down and add the final flour mixture, mixing until well blended. The dough will be soft and slightly sticky.
  7. Roll out on well floured surface to approximately 20" x 14".
  8. Spread rolled out dough with lactose free margarine, then spoon brown sugar, cinnamon, and salt mixture evenly on top and sprinkle with pecans if using.
  9. Roll up tightly jelly roll style and pinch the seam closed.
  10. Cut into 14 even slices and place in well greased 9" x 13" pans.
  11. Cover and allow to rise in warm place for 30 minutes.
  12. Bake in a 375º oven for 20 minutes or until golden in color.
  13. Drizzle with glaze while still warm.
  14. Yield: 14 rolls
Glaze:
  • 1 1/2 cup icing sugar
  • 2 teaspoons pumpkin puree
  • 1 teaspoon maple extract
  • 2 tablespoons coconut milk.
  1. Whisk together until smooth.

BBQ Bean and Sausage Soup


Now that we're in the midst of the Fall Season, 
I gravitate to making soup for lunches.
This one is simple - made in less than an hour.
Barbeque Sauce adds a smokey zip to the beans and sausage.

  • 1/2  large sweet onion, diced
  • 1/2  red or yellow pepper, seeded and diced
  • 1/2 green pepper, seeded and diced
  • 1 large carrot, peeled and diced
  • 3 stalks celery diced
  • 1 tablespoon olive oil
  • 1 - 8" length smoked farmer sausage (or ham sausage) diced
  • 2 bay leaves
  • 2 cups diced canned tomatoes
  • 1 package dry onion soup mix
  • 5 cups water
  • 1 can baked beans
  • 1 teaspoon "Beef Better than Bouillon" or 1 beef bouillon cube
  • 1/4 cup Barbeque Sauce
  • a few dashes hot pepper sauce if desired
  • 2 cups frozen corn or 1 large can corn, drained.

  1. place diced vegetables in a frying pan with olive oil and saute until tender.
  2. Add diced farmer sausage and bay leaves and continue to cook until farmer sausage begins to brown.
  3. Place sausage and sauteed vegetables in a dutch oven and add remaining ingredients except corn.
  4. Simmer soup on low for about 1/2 hour, stirring frequently.
  5. Add corn and continue to cook for another 5-10 minutes.
  6. Serve topped with Cheddar cheese or sour cream if desired.

Bread for the Journey


Many of us memorized Psalm 119:105 a long time ago . . .
be it in Sunday School or at Pioneer Girls . . .
or maybe it was given to us at a significant time, such as our baptism.

Recently I had to think on what this verse means to me right now
at this time in life . . . why is it important to me?
I mulled about how I can find verses to help me when I'm fearful, 
need comfort or encouragement.
I thought about how God's word tells us where it all began, 
it tells us that we are not here by chance, that we are valued.
It tells us about those who chose to trust in God and those who did not.
It tells us how God provided salvation for us and
of the hope we have in Him.

But, my thoughts kept going and I realized why this verse has significance.
God's word is timeless.
What that means is that in this world, where things keep changing,
God's word stays the same.
His word is a light that exposes truth,
giving us a rock to stand on - an anchor for our soul.

In times when it's difficult to distinguish right from wrong
may God's word be a light for our path.

Apple Sauce Cookies


A few days ago I took my granddaughter, Ivy on a small field trip to our friend's home to share the experience of picking apples from the ground and tree, just like I did when I was a small girl.  The fallen apples were always perfect for pies, cookies, apple crisps, apple sauce, Perishky or even drying.
There was never a wasted apple.  Every fall, my father would drive the family sedan to Osoyoos to pick up a load of apples.   We first had to eat the McIntosh and Spartans, which lasted till Christmas. After Christmas, we could eat the red and yellow delicious apples as they were preserved longer. Today I love the Honey Crisp apples and I'm thankful I don't have to wait for any seasonal times.

Ingredients
  • 1/2 cup butter
  • 1 1/2 cups brown sugar
  • 1 egg
  • 1 tsp. baking soda
  • 1/2 tsp salt
  • 1/2 tsp nutmeg
  • 1 tsp cinnamon
  • 1/2 tsp cloves
  • 2 cups flour
  • 1/2 cup milk
  • 1 cup raisins
  • 1 cup diced apples

Instructions.
  1. Peel the apples and dice.
  2. Cream butter, sugar, and egg in a bowl
  3. Add flour and dry spices to the mixture
  4. Add liquid, apples, raisins and mix well.
  5. Drop dough onto parchment paper
  6. Bake in oven at 400 degrees° for 12 minutes.
  7. Cool on parchment paper for a few minutes and transfer to cookie racks


Tip from Ivy:  "Oma, don't forget the baking soda.  Mummy forgot to put the baking soda in the cookies and they did not grow...."

Take a peek at Bev's muffin apple recipe.  This recipe is so delicious and makes a big batch.

Flashback Friday ~ Chicken Rice Casserole

Sunday dinner was always special in our home.  My mom had two children later in life and I remember how she stayed home while my father took my siblings to church.  It was always a treat for me to come home and have a table set with her china and sit down to a hearty meal.  I so much appreciate how she cared for us in so many ways.  I wish I could now invite her to my home and bless her.  Today's recipe is a flashback of one of my mom's favorite Sunday recipes.


Ingredients
  • 1 cup uncooked rice
  • 4 uncooked chicken breasts
  • 1 cream of chicken soup (10oz)
  • 1 cream of mushroom soup (10oz)
  • 2 cups water
  • 1 pkg onion soup mix
  • 1/2 cup toasted slivered almonds
Method
  1. Preheat oven to 350°
  2. Measure the rice into the bottom of a medium size casserole/dish or 9x6 glassware.
  3. Cut breasts into serving-size pieces slicing through at an angle so that they are not more than 3/4 inch thick.
  4. Lay chicken pieces over the uncooked rice
  5. In a small bowl mix soups together and spread this mixture over the chicken.
  6. Add two cups of water.
  7. Sprinkle onion soup mix on top
  8. Add roasted almonds on top for garnish
  9. Cover with a lid and bake for two hours

Remember you can make this yourself Sunday morning, put it in the oven, and come home to a wonderful aroma like Mom's been in the kitchen all day.  Enjoy!


Pizza Pretzels


I've started to enlist the help of Mom to come help me make treats for the littles lunches.  
These pizza pretzels are not a pretzel in the true sense that they are boiled first but they have the pretzel shape and they are a real hit. 
Dough
  • 4 cups whole wheat flour
  • about 1 1/4 cup white flour additional flour to make a soft dough
  • 2 tablespoons instant yeast
  • 1/3 cup sugar
  • 2 teaspoons salt
  • 1/2 cup soft or melted butter 
  • 1 cup milk 
  • 1 cup water
  • 2 slightly beaten large eggs
  1. Place dry ingredients in a large bowl or in the bowl of your mixer.  Stir to combine.
  2. Heat the milk up until it is hot to touch.  Add water, butter and eggs.  Whisk together. 
  3. Add to the dry ingredients in the bowl.  Stir to combine and then knead, adding flour as needed until the dough is smooth and elastic.  
  4. Place the dough into a greased bowl, cover with a tea towel and allow to rise for about 45 minutes or until double.   You can put the dough in the refrigerator overnight.  Allow to come to come to room temperature before shaping into buns. 
Pizza Toppings
  • pizza sauce
  • cheddar mozzarella  blend shredded cheese (about 2 pounds)
  • dry pizza sliced pepperoni * 
  1. Divide dough in half and roll into a large rectangle.  Cut into long strips and then roll with your hands to round them off. The strip should be about 18  inches long.
  2. Fold in half and twist it about half way down and then form into pretzel shape as shown in photo below.
  3. Let rise on greased pans or pans lined with parchment paper until doubled in bulk.  Spread with pizza sauce and sprinkle with cheese and put a few pieces of pepperoni on each pretzel.
  4. Preheat oven to 350 and bake until the cheese has melted and the buns are golden brown.
  5. Allow to cool and then freeze in bags.  
*I buy Grimm's and it comes in a 175 gram package.  Any sliced pepperoni will work just fine. 


Apple Pie Scones


I recently stopped by a local bakery and picked up a few scones.  One was an 'Apple Pie Scone' and we rather liked it.  I converted one of my scone recipes to something similar and will give it the same name. 

  • 2 cups flour
  • 1/2 teaspoon salt
  • 1/4 cup sugar
  • 2 teaspoons baking powder
  • 1/2 teaspoon baking soda
  • 1/4 cup cold butter
  • 1 1/2 cups finely chopped apple (tart apples such as Honeycrisp or Granny Smith are best)
  • 1 Tablespoon brown sugar
  • 1 teaspoon cinnamon
  • 1 large egg
  • 1 cup buttermilk
Glaze:
  • 1 tablespoon butter
  • 2 tablespoons milk
  • 1/4 cup brown sugar
  • 1/4 teaspoon cinnamon
  • 1/4 to 1/2 cup icing sugar
  1. Preheat your oven to 375°F. 
  2. In a large bowl, combine the flour, salt, sugar, baking powder and baking soda.
  3. Cut in the butter, using a pastry blender...or grate with a coarse grater and combine with fingertips. 
  4. In separate bowl, add brown sugar and cinnamon to diced apple and stir to coat.  Add to dry ingredients and stir to distribute apple pieces throughout.
  5. Whisk together the eggs and buttermilk.
  6. Stir this mixture into the dry ingredients. 
  7. Drop by large spoonfuls (ice-cream scoop) onto parchment paper lined cookie sheet.
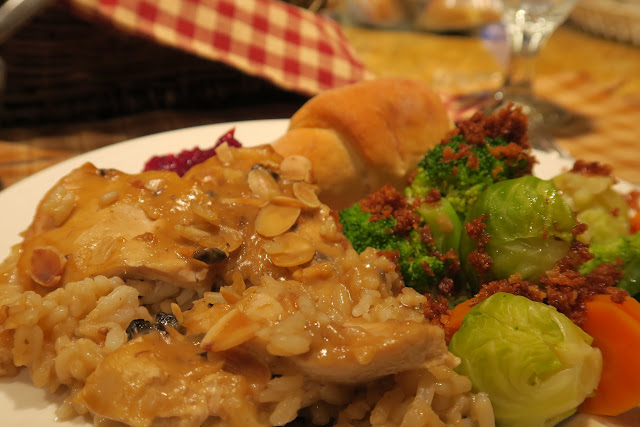
  8. Bake until golden...15 to 18 minutes.
  9. While still warm, drizzle with glaze.  (Heat butter and milk together in microwave for 30 seconds on high. Add brown sugar and cinnamon and stir until sugar is melted. Stir in icing sugar a little at a time until smooth and desired thickness.)
 Yield: 1 dozen large scones.

Tip: Scones are best enjoyed fresh from the oven.  They do freeze well, however.  Just thaw, heat and serve.

Enjoy!
 

Russian Beet Salad (Vinegrette) Винегрет


Although the Russian name for this salad is Vinegrette it shouldn't be confused with the salad dressings called Vinaigrette. This was a traditional salad that we enjoyed growing up. It could be our version of potato salad. I'm sharing an easier version using canned beets but you can also cook and julienne your own beets. The photo is my sister Lana's.

Ingredients:
  • 2 cans (15oz.) julienne beets (partly drained)
  • 2 cans (15oz.) kidney beans (drained well)
  • 3/4 - 1 cup sauerkraut (drained and squeezed)
  • 3 boiled potatoes
  • 3 large kosher dill pickles, diced
  • 1/4 onion, grated
  • vegetable oil
  • salt and pepper to taste
  • pickle juice from the jarred dill pickles

Method:
  1. Dice potatoes while warm then salt and coat with oil and chill.
  2. Once the potatoes are chilled add the remaining ingredients and toss to combine, add enough pickle juice to taste.
  3. Chill until ready to serve.
  4. Serves 8-16  

Our family prefers using the Clausen Dill Pickles found in the refrigerator section. You will find some versions of this Russian salad using carrots and not kidney beans. This is the version our family has always enjoyed.


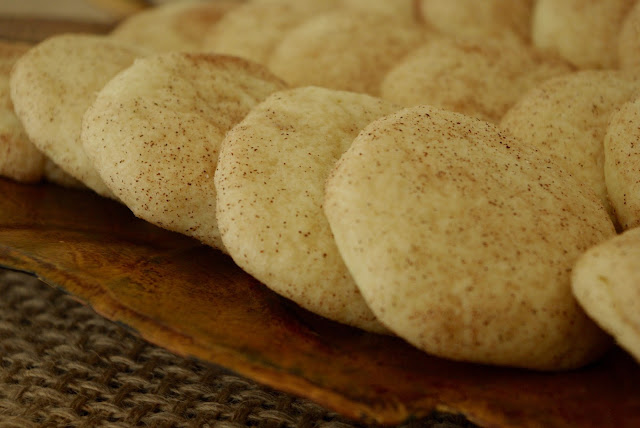
Snickerdoodles

These cookies take me back to my growing up years. My sister Rhoda came home from school one day with a new recipe from her Home Economics cooking class. Snickerdoodles soon became a house hold favourite.
  • 1 cup butter, room temperature
  • 2 cups white sugar
  • 2 eggs
  • 1 teaspoons vanilla
  • 3 1/2 cups flour
  • 1/2 teaspoon baking soda
  • 1/2 teaspoon cream of tartar

Sugar coating:
  • 4 tablespoons white sugar
  • 2 teaspoons cinnamon
  1. Cream together butter, sugar, eggs and vanilla until creamy.
  2. Add all dry ingredients and beat until incorporated.
  3. Stir together sugar coating in a small bowl.
  4. Roll cookies into 1 1/2" balls and then roll in the sugar coating covering all sides.
  5. Bake at 375º for 8 minutes. Do not over bake.
  6. Allow to cool on pan for 1-2 minutes before removing to cooling rake. 
These cookies freeze well. 
Yields approximately 2 1/2 dozen.


Bread for the Journey


In everything give thanks; 
for this is God's will for you in  Christ Jesus.
1 Thessalonians 5:18

When one looks at the state of the world today, we see injustice, political unrest, civil war, starvation,
social tragedies, natural disasters, financial calamity, the war on Syria. 
How are we to give thanks in all these situations? 
Does this mean that we are supposed to be thankful for the evil in this world?
I've come to realize that when life isn't working out as we had expected, we can still give God thanks for being present with us during the difficult times.  I have often experienced in my own life that God has often used my struggles to draw me closer to him.

Over the past few months I have been reading immigration stories of those who fled from Ukraine to Canada in the early 1920's.  When I stop and observe their challenges, I wonder...is it really any different today? 
Many of them experienced starvation, financial loss, war and bloodshed, loss of jobs, sickness, death,  rape, separation and anxiety.  They lost everything that they had and came as 'refugees' to Canada to start a new life. In these stories I have observed a common thread of hymns, prayers, scriptures and thankfulness which accompanied our forefathers fleeing from the Ukraine.
Many times I wondered why they didn't give up.  Day by day, step by step, they thanked God for yet another good night's rest. Phrases like "tears of joy and gratitude to God that he had spared the horse and in grace had answered my prayers,"  "The Lord blessed us" are woven throughout their stories.

This past weekend we had the opportunity to cook a meal for the Kyiv Symphony Orchestra and Chorus with Wes and Kim Janzen conducting the choir on their 2016 Canada ~ Ukraine Friendship Tour. You can read about their incredible story of passion and ministry for the Ukraine people.
We not only heard beautiful music, but we also heard stories of suffering and trauma. We heard first hand how the royalties from our Mennonite Girls Can Cook Books have made a significant impact on the lives of widows and orphans.  It was pointed out that there are over 1.5 million IDP's (internally displaced people) in the Ukraine. Choir members are also feeling the impact...some of them only had one pair of shoes, one skirt, for travelling over the past month.  Most of us would have major issues.


Once again I have been reminded to pour out my heart to God for thanks and to continue thanking him for the on-going ministry of the Music Mission Ukraine Canada in offering support to the people who have fled their homes often only with clothes on their backs.  This sounds just like the stories that I have been reading about and it's still so true in today's world. Has anything really changed?

Let's be inspired and motivated by these stories and live out our faith in these days of difficulty and uncertainty.   We too, can leave a legacy of thanksgiving to God and help the next generation to know that God will provide. We want to continue thanking God that we can trust him and know that nothing happens outside of  his plan of history for our lives, just like he promised our forefathers.


Get a jump start on your Christmas shopping, purchase a book and know that you are making a difference.


Saturday in Anneliese's Kitchen

Today is a tag-on to the school lunch ideas posted a few years back. I know the moms in my family and many moms and dads today are always trying to figure out how to pack healthy lunches for their kids. Maybe there is something here that your kids or grandchildren will like.


Edamame Beans

If these beans have not been introduced to your family, I would highly recommend them, as I've seen how my grandchildren love them! Edamame beans are soybeans that have been harvested before the beans harden and provide a good source of protein, iron and calcium. Steamed in their pods and sprinkled with salt, snacking on them reminds me of snacking on sunflower seeds, where you get the saltiness from the shells and enjoy the meat inside. We have enjoyed them hot as an appy, but they taste just as good, cold the next day.
  • 1 500 g bag of frozen edamame 
  • sea salt
  1. In medium sized pot, bring 3 cups of water and 1 tsp salt to boil. 
  2. Add beans, bring to boil and cook, uncovered for 5 minutes. 
  3. Drain and sprinkle generously with sea salt. 
  4. Serve in pods or without 
  5. Gently squeeze pods to remove beans and discard pods.
Baked Apple Chips


  • 3 - 4 apples
  • 1/2 lemon, juiced
  1. Preheat oven to 250 F. If you have convection setting, you can bake several sheets at the same time.
  2. Line cookie sheets with parchment paper. Prepare a small bowl with 1/4 cup water and juice of half a lemon.
  3. Slice apples into thin rounds. Dip into lemon water before spreading out on cookie sheets in a single layer.
  4. Bake for 30 minutes. Remove from oven, turn slices over and bake another 30 minutes.  Once they feel dry to the touch, they are done. Length of time will depend on how thin the slices are. If they are a bit on the thick side, you may need to double the baking time. Watch carefully so they do not turn dark and crispy.
  5. Cool and store in sealed container. I refrigerate them.

Fresh Cut Apple Slices

I saw this idea in a magazine and apparently, at least according to some little girls in our family, they are the best apples in the world! So why not share such simple goodness! Dip them in lemon juice to keep from browning.


Finger Jelly 

This version of finger jello, is a fun way to incorporate the health benefits of natural gelatin, by combining it with  your child's favorite unsweetened juice drink.  It works best with  juices that are naturally very sweet, like grapes, mango or peach. I add 1 - 2 Tbsp of sugar per 3 cups of liquid. You can leave it out if you like or adjust to personal taste.


  • 3 cups unsweetened fruit juice ( like grape, berry & pomegranate, peach &mango)
  • 3 pkgs Knox gelatin
  • 1 - 2 Tbsp sugar
  1. Boil 1 cup of the juice. 
  2. Pour over gelatin mixed with sugar in a glass bowl, beginning with a small amount and stirring the whole time until is completely dissolved.
  3. Add 2 cups cold fruit juice and pour into small glass Pyrex baking dish. Using a sieve helps catch any tiny lumps and bubbles.
  4. Refrigerate until firm, about 3 hours or overnight. Cut into squares. 

Chocolate Milk Pudding Cups

Homemade pudding is so easy to make and you know exactly what is in it.


  • 2 cups milk, divided
  • 4 Tbsp flour or 3 Tbsp cornstarch
  • 6 Tbsp Nestle Nesquik powder (or 4 Tbsp Nesquik plus 2 Tbsp cocoa)
  • 1 Tbsp sugar, optional
  • 2 egg yolks
  1. In a small pot, just below medium heat, bring 1 1/2 cups milk to almost boiling point.
  2. In the meantime, in a small bowl or 4-cup measuring cup, mix dry ingredients, then stir in 1/4 cup milk to make a smooth paste. Stir in egg yolks and then the final 1/4 cup milk. 
  3. When the milk in the pot shows tiny bubbles along the side and a bit of skin forming on top, stir in the chocolate mix and keep stirring with whisk until smooth and bubbly.  If lumps appear, keep stirring. They will go away.
  4. Cool slightly. ( Set the pot into sink with cold water, stirring for several minutes) Pour into individual take alongs before it sets.. Cover and refrigerate. Yield 4 or 5 - 4 oz minis. 

For dark chocolate taste, add some cocoa and a bit more sugar if desired. Can easily be altered to personal taste. When adjusting the recipe for size, use 1 Tbsp flour and 1 1/2 Tbsp Nesquick for every 1/2 cup milk.