Mennonite Girls Can Cook is a collection of recipes which were posted daily for a period of ten years from 2008 to 2018. We have over 3,000 delicious recipes that we invite you to try. The recipes can be accessed in our recipe file by category or you can use the search engine.

Recipe Search

Teriyaki Chicken Dip


Many of us love the layered shrimp and cream cheese dip.  
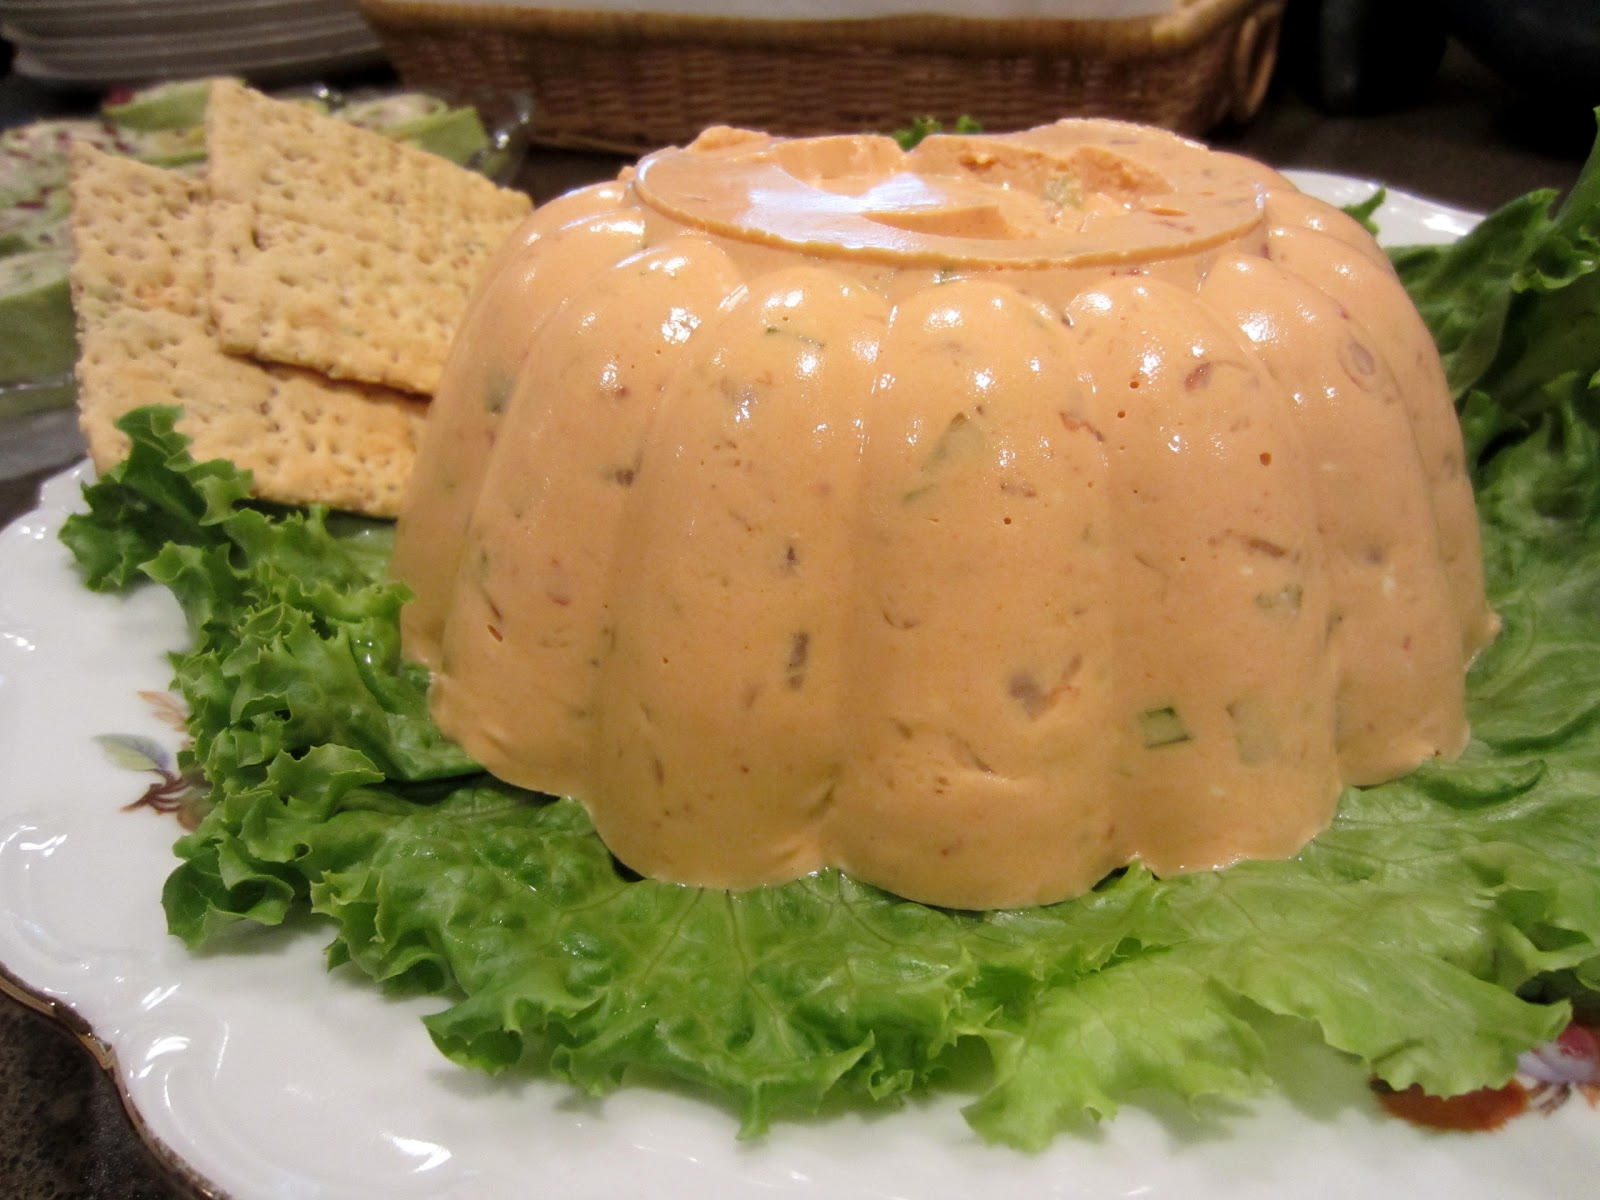
Here is another variation made with chicken and teriyaki  sauce.  
Actually the variations of this layered dip are limited only by your taste preferences and imagination. 
It's a great appetizer to bring to that neighbourhood BBQ.

  • 1  (8 ounce) package cream cheese
  • 2 tablespoons sour cream
  • 2 tablespoons mayonnaise
  • about 1 cup  prepared or bottled Teriyaki Sauce* (recipe follows) 
  • 2 cups finely cubed cooked chicken
  • 2 tablespoons finely chopped carrot
  • 2 tablespoons chopped peanuts or cashews
  • fresh chives, finely snipped
* You could substitute a Thai Sweet Chili sauce or a Peanut sauce for the Teriyaki)

For the Teriyaki Sauce:


(This is also good brushed over chicken. If you are doing it on the barbecue, only brush it on for the last few minutes of cooking.)
Ingredients:
  • 1/2 cup ketchup
  • 1/4 cup soy sauce
  • 1/2 cup honey
  • 1/4 cup sherry
  • 1 tablespoon freshly grated ginger or 1/2 teaspoon ground ginger
  • 1 finely minced clove of garlic
  • 2 tablespoons cornstarch
  • 1/4 cup water or pineapple juice
  1. Mix all the Teriyaki sauce ingredients except cornstarch and water in microwaveable bowl.
  2. Heat in microwave at 1 minute intervals, stirring in between until mixture is heated.
  3. Mix cornstarch and water or juice and stir into hot mixture.
  4. Return to microwave and cook until it bubbles.  If sauce seems too thick, add more water or juice.
  5. Cool to room temperature before spreading over cream cheese layer.
  6. This makes quite a thick sauce.  If using it to brush over barbecued or baked chicken, you may want to thin the sauce with more juice.
To Assemble Dip:
  1. Prepare  Teriyaki sauce and let cool to room temperature. Or prepare a day ahead, refrigerating the sauce.
  2. In a medium sized bowl, beat cream cheese with sour cream and mayonnaise until smooth and creamy.
  3. Spread cream cheese in a thin layer on a serving platter.
  4. Spread a layer of Teriyaki sauce evenly over the cream cheese layer, leaving a bit of the cream cheese showing around the edge.
  5. Mix cubed chicken with about 1/2 - 1/3 cup Teriyaki sauce.  You just want to be sure the chicken all has a light coating of sauce.
  6. Spread chicken evenly over Teriyaki sauce, leaving a bit of the sauce showing around the edge.
  7. Sprinkle chicken with chopped carrot, nuts and chives.
  8. Serve with crackers or multigrain chips.


Blueberry Cucumber Salad

The local blueberries are ripe...and oh-so-good!  Fresh from the garden, on a parfait for dessert or on a salad for lunch, they are the taste of summer.


Salad:
  • 6 cups of mixed greens or baby spinach leaves
  • 1/4 cup minced chives
  • 1 1/2 cups chopped cucumbers
  • 1 cup blueberries
  • 1/2 cup crumbled feta cheese
  • 1/4 cup roasted sunflower seeds
  1. In a large bowl, combine greens, chives, cucumbers, and blueberries.
  2. Toss with vinaigrette dressing and place on serving platter.
  3. Sprinkle with feta and sunflower seeds. 
  4. Serve with additional dressing on the side.
 Serves 4. 

Creamy Honey Vinaigrette Dressing:

  • 1/4 cup white wine vinegar
  • 3 tablespoons liquid honey
  • 1 tablespoon mayonnaise
  • 1 teaspoon dijon mustard
  • 1/2 teaspoon salt
  • 1/2 teaspoon black pepper
  • 1 large clove garlic, minced
  • 3/4 cup olive oil
  1. Whisk together vinegar, honey, mayonnaise, mustard, salt and pepper.
  2.  Gradually whisk in oil.
  3. Blend in minced garlic.
Makes about 1 1/4 cups dressing.  


Bread for the Journey


The DRESS!
We are having a wedding in our family this summer,
 and so I pulled out my Mother's wedding dress, which was carefully sewn by her mother.
This summer it takes precedence as it hangs in our hallway.
It is not only a daily reminder, that we are having a wedding...but much more than that.
A few years back, while I was on a cleaning binge, I discovered the dress.
I called my sister to see if she would like to keep the dress.
The decision was made to give it to Good Will.
When suddenly, she blurted out,
 "No, we can't get rid of this dress. This dress means COMMITMENT!"
We knew our mother worked hard, stayed loyal, and committed,
knowing that her life was not without challenges.

Remember your wedding, with all its festivities, showers, parties, preparations,
the wedding itself, and just the two of you on your honeymoon?

Today's media has rediscovered the word 'commitment' as an optional plan.
'Happily ever after' has been transformed into, "Make me happy or I'll find some who will."
Excuses for today's world which seem to be prominently acceptable:

"I couldn't breathe, so I had to come up for air"
"I don't want to be tied down
 "We are two people going in two different directions."
"Why go through this hell?"
"I never was truly in love."
"Divorce is the norm..."

What is real COMMITMENT?
God has committed himself to us regardless of how we perform.
God wasn't attracted to you and didn't choose you because you were big and important—the fact is, there was almost nothing to you. He did it out of sheer love.
A good marriage is not something you find, it's something that you work for.
It takes struggle.  Let go of your selfishness.
At times you need to confront and at other times confess.
The practice of forgiveness is essential.
Let's honor the call to holiness rather than to happiness.
We all know that Christian marriages will be struck by lightning,
sexual temptation, communication breakdowns, frustrations, and unrealized expectations.
Water your marriage with an unwavering commitment to please God above everything else.
Think about the analogy of Christ and his church.

"Know therefore that the Lord your God is God; he is the faithful God, keeping his covenant
of love to a thousand generations of those who love him and keep his commandments."
Deuteronomy 7:9
'Keep the Dress'... revisit your vows, and say "I do" every day.

Apricot Jam

This jar of sunshine contains no packaged pectin of any kind. Cooked with more fruit than sugar, gives this jam a fresh taste of apricots. It is simple to make, you just need a bit of time.


  • 12 cups of finely chopped apricots (save the pits)
  • 8 cups of sugar
  • 1/4 cup of lemon juice (the lemon juice prevents the fruit from browning and just enhances the flavor of the fruit).
  1. Combine the chopped apricots, sugar, lemon juice and let sit in the pot for 1 hour.
  2. Add a handful of pits to the pot. Don't ask why, it is just one of those things you don't question, it is just always done that way:) At least that is what I was told, Oma did it that way, mom does it that way, so I do it that way...is that a good enough reason, I sure hope so. Actually I think it adds to the natural flavor.  (I am told it is a natural pectin).

3. When the fruit comes to a boil it fill develop a foam on top. Skim of the foam and put it into a bowl. Do not discard until cool, because it has a beautiful syrup under it and can be used on pancakes.

4. Once the mixture is boiling and the foam has been skimmed off, boil on medium low for about 40 minutes or so, stirring often with a wooden flat bottom spoon to get into the corners of the pot.

5. Pour into sterilized jars with a wide mouth funnel, leaving about an inch or more of head room. I always freeze my jam instead of sealing them so you need to leave more room at the top of the jar for that.
Serve on fresh scones, toast or homemade buns. I love apricot jam, it just reminds me of home.

Transparent Apple Perishky

Every year I keep my eye open at Neufeld Farms for the green tart Transparent Apples that make such delicious pies and apple sauce.  It is the earliest apple of the summer and they are usually favoured for baking.  This is my mom in law's recipe.  The dough is so easy to work with and it turns out tender and flaky every time.  This recipe also freezes really well.  Once the perishky have cooled, simply wrap them in heavy foil and then in a bag and freeze them.  To serve later, open the foil  and slip the perishky on the foil in the oven until heated through.
  • 5  1/2 cup flour
  • 1 cup lard
  • 1/2 cup butter
  • 2 teaspoon salt
  • 1 teaspoon baking powder
  • 2 eggs beaten with enough evaporated milk to make 1 1/2 cups total liquid
  • 2 cup sugar
  • 1/4 cup minute tapioca
  • 4 pounds fresh transparent apples
  1. Cut the lard and butter into the flour with a pastry blender.
  2. Add the salt and the baking powder with a fork.
  3. Add the liquid into the flour and stir with a fork until mostly combined.
  4. Turn onto a floured counter and bring together with several kneads into a large disc.
  5. Wrap with plastic wrap and chill for several hours.
  6. Divide the dough in half and roll out the first piece of pastry on a well floured surface into a large rectangle measuring about 2 feet long and a foot and a half wide.  It should be quite thin. Make sure you keep the dough from sticking underneath by adding a bit more flour and to the top as well.  ( a pastry mat is a wonderful tool for rolling our pastry)  Try to use flour sparingly as it helps later when you fold the pastry over to make a better seal if it is not dusted with flour.
  7. Cut the large pastry into four rectangles and then work on one at a time...rolling a bit thinner if you notice it is a bit thick on one side.
  8. I typically peel and slice one apple at a time which is enough for one long strip.  They brown so quickly that I try to work quickly.  Once baked they look wonderful so don't worry too much about the browning.
  9. Sprinkle a bit (maybe a half teaspoon  to teaspoon per row) of tapioca down the center and then the diced apples and then sprinkle sugar on top of the row.  I usually use about 1/4 cup sugar per row and a teaspoon of tapicoa.  
  10. Bring the long sides together. .overlapping as best you can.   Bring the ends up and overlap on top.  Pat the dough lightly.  It will stay together fine unless you have flour dusted on the edges.  Even if they come apart slightly they will be delicous.
  11. Bake in a 375 F oven until golden brown and the juices clear.

Hot Beef Wraps

 
I've made these wraps a few times now when I've had some leftover steak and black bean salad. I tell you, it's worth making the black bean salad just for these wraps.  A perfect combination!
Ingredients:
  • 1/2 large onion, thinly sliced
  • 1 yellow sweet pepper, thinly sliced
  • 1 - 8z steak, cooked medium well, thinly sliced
  • 1/4 teaspoon cumin
  • a good shake of Mexican spice (optional)
  • 3 cups black bean salad - posted here ( if you are preparing it for the wraps, do 1/2 recipe)
  • 5 large tortilla wraps
Method:
  1. In a small amount of olive oil, cook onion until caramel in color, adding sweet pepper part way through and then the steak to heat through.
  2. Season according to personal preference with cumin and Mexican spice.
  3. Top with bean salad and let sit until steamed through.
  4. In the meantime, warm tortilla wraps. Fill and enjoy!
Posted by Picasa

Potato Skins

Add a salad or cut up veggies and these loaded potato skins become a meal.
They are also a great addition to an appetizer bar. 

Ingredients: to serve 4
  • 4 large russet baking potatoes
  • 1 pound bacon
  • 1 1/2 cup cheddar cheese
  • 1/4 cup butter, melted
  • chives, snipped fine (or use green onions)
  • sour cream
Method:
  1. Wash potatoes and poke each with the tines of a fork in several places.
  2. Bake potatoes unwrapped directly on oven grills at 400º until done. Approximately 45-60 minutes.
  3. Remove from oven and cool. Cut each baked potato length wise into four pieces. 
  4. Scoop out potato flesh leaving a thin layer of the flesh on each skin. Save scooped out flesh for fried potatoes in the next day or two. Your family will love 'em!:)
  5. Fry bacon until crisp. Crumble.
  6. Grate cheese and snip chives. 
  7. Place potato skins on a baking sheet. Brush each with melted butter. Broil for 3-4 minutes to just crisp them up. Watch so they do not burn. They should start to become golden.
  8. Remove from oven and top with bacon, chives and cheese.
  9. Place back under the broiler until the cheese is nicely melted and just begins to show signs of browning.
  10. Top with remaining chives and sour cream.

Lemon Curd Cookies


It's been awhile since I made anything with lemon. I love cookies with a filling tucked into the middle. And if it's lemon how could I resist? These cookies are chewy in the middle with crusty edges. They freeze well but it's a small recipe so I'm thinking they won't make it to the freezer.

Ingredients:
  • 3/4 cup butter
  • 3/4 cup sugar
  • 1 egg
  • Zest of 1 lemon
  • 1 teaspoon vanilla
  • 2 cups flour
  • 1/2 teaspoon salt
  • Lemon curd
  • Icing sugar and extra lemon zest
Directions:
  1. Cream together butter and sugar until light and fluffy.
  2. Add egg, vanilla, and lemon zest and mix until well combined.
  3. Stir in flour and salt just until blended.
  4. Roll out dough to 1/4 " thickness and cut with a 2 1/2" round cookie cutter.
  5. Drop approximately half a teaspoon lemon curd on half of the cookies and cover each cookie with another cookie pinching the edges together.
  6. Place on parchment lined cookie sheets.
  7. Bake in a 350º oven for 12 minutes.
  8. Cool, dust with icing sugar and lemon zest. You can omit this step but it sure makes the cookies look pretty.
  9. Yield: 16 cookies

Bread for the Journey


A year ago we welcomed a new grandson into the family on the same day of his grandpa's birthday.
I've watched this little one during the year and in particular the other day it occurred to me that the relationship once one-sided is becoming a bond between the two. 

  •  0 -  2 months...he valued the strong secure arms that willingly carried him when it was necessary to wait until Mommy's arms were free.
  • 3 - 4  months... he valued those same strong arms bouncing him on his lap.
  • 5 - 6  months...he counted on those strong arms to keep him from toppling while he learned to sit.
  • 7 - 8 months... those strong arms held out encouragement for him to crawl towards a goal.
  • 9 - 10 months...those strong arms reached down allowing the grasp of tiny fingers as he tentatively took his first steps.
  • Tomorrow he will be a year ....  and he runs to the arms of the Grandpa who has always smiled encouragement and has loved him...even before he loved Grandpa back.


We can't even begin to compare human relationships with the relationship between us and God and yet  God created these relationships in part so that we can see the heart of God and his faithfulness to us even before we can see our need for him.  We can never know the mind of God but we have seen his heart of love towards man kind.  He longs to have us reach out to him and wants us to communicate with him.  

Father in heaven, thank you for the beautiful examples of human relationships that you have given us.  Thank you for the gift of families and for each opportunity to share life together.
Lord, may we be faithful in speaking love into the lives of these little ones so that when they grow older and need wise counsel, we will have built a safe place for them to invite examples from our own life experience.   Teach us Lord and give us hearts to be more like Christ each day.
In all this Lord... we give you glory and praise.
In Jesus name,
Amen


For the Lord is good; his steadfast love endures forever, and his faithfulness to all generations.
Psalm 100:5


Green Beans and Peppers in a Sweet Chili Sauce


Vegetables are a very important part of our everyday meals.  This dish is very quick and easy to make with steam fried assortment of vegetables that is low in fat, beautiful to look at and very tasty.  This dish brightens up the table of any  simple supper.  This is what I used~

  • 1 teaspoon of olive oil
  • One small onion sliced very thin
  • 1 yellow pepper cut in strips
  • once carrot per person cut into sticks
  • enough green beans that you would need for the amount of people that you are serving. (I used frozen)
  • sweet chili sauce to pour on top
  • or a squeeze of fresh lime
  1. Heat a large saute pan or wok, add the oil.  
  2. Then add the onion, pepper, and carrots.  Stir well and cook for one minute.  Add a 2 tablespoons water, cover the pan and cook until the carrots are tender crisp.  If the water disappears add a bit more, you want to steam the veggies until tender.  
  3. Then when the carrots are tender, add you frozen green beans, stir  and cover the pot again until the green beans are cooked through and bright green.  
  4. Pour over desired amount of the Sweet Chili Sauce.
  5. Serve, with fresh limes to squeeze over. This is always one vegetable dish that gets reached for a second helping.

Toffee Topped Sheet Cake


I recently found several recipes for this cake on Pinterest and because we love the chocolate Texas Sheet Cake I thought it would be nice to try a "white" version.  
I added toffee bits and toasted almonds to the frosting and everyone who tried it gave me a thumbs up.  So here is the recipe as I made it.

For the cake:
  • 1 cup unsalted butter
  • 1 cup water
  • 2 cups flour
  • 2 cups sugar
  • 1 teaspoon baking soda 
  • 1 teaspoon salt
  • 1/2 cup buttermilk
  • 2 eggs
  • 2 teaspoons vanilla
For the frosting:
  • 1/2 cup butter
  • 1/2 cup buttermilk
  • 4-5 cups icing sugar
  • 1 teaspoon vanilla
  • salt to taste
  • 1 1/4 cups toffee bits (you can buy these in the baking aisle)
  • 1 1/4 cups almonds, lightly toasted*
*I toast these in a dry frying pan over medium heat, stirring frequently until nicely browned.  They will burn very quickly so watch them closely.

Method for the cake:
  1. Grease and flour an 11x15 inch baking pan and set aside.
  2. Preheat oven to 375 degrees..
  3. Place butter and water in a large saucepan and bring to a boil.  Remove from heat.
  4. Sift flour, sugar, baking soda and salt in a bowl.
  5. In a measuring cup, mix buttermilk with eggs  and vanilla until blended, stir in vanilla.
  6. Add  buttermilk/egg mixture to bowl of dry ingredients and mix just until all the flour is moistened.
  7. Using a spatula or wooden spoon, add large dollops of this batter to the butter/water mixture in the saucepan, mixing very well between additions.
  8. When it is all combined, pour into prepared baking pan and bake at 375 degrees for 25 minutes or until cake is set.
  9. Let cool 10 minutes before preparing icing.  You should ice the cake while it is still warm.
Method for Frosting:
  1. Bring butter and buttermilk to a boil in a large saucepan. (It will look a bit curdled)
  2. Remove from heat and mix in 3 cups icing sugar, vanilla and a pinch of salt if desired.  Continue to add icing sugar  and mix until desired consistency is reached.  (This frosting will thicken as it cools so work fairly quickly. I was almost a cup short of icing sugar when I made this and even though the icing looked fairly runny when I poured it over the cake it still set nicely.)
  3. Stir in toffee bits and all but 1/4 cup of the almonds.
  4. Spread over warm cake and sprinkle with remaining almonds.
  5. Let cool before serving.
  6. Makes 20 generous sized pieces.  This freezes very well.


Split Pea Soup

Last year my sister and I sat around my dad's kitchen table complimenting him on his pea soup. Our dad has become quite the cook since becoming a widower and he loves it when we ask him for his recipes. This has become one of our favourites. I make it in a crock pot but it can be made on the stove top as well. This soup freezes well and is perfect to bring along camping or deliver to a shut in.

Ingredients:
  • 2 cups dry green peas
  • 2 cups lean ham, cubes ( I use left over ham or purchase a large ham steak and cut it up)
  • 2 carrots, grated
  • 1 large onion, chopped fine
  • 2 cloves garlic, crushes
  • 2 bay leaves
  • 1/2 tsp salt
  • 1/2 tsp pepper
  • 6 1/2 cups boiling water
  • 1 cup hot milk (optional)
Method:
  1. Wash and rinse peas and place in the bottom of the crock pot. (no need to soak peas)
  2. Cut us meat and vegetables and place over peas. Add spices.
  3. Pour boiling water over all and give mixture a stir.
  4. Cover crock pot and turn on low. Let cook for 6-8 hours. If cooking on the stove top you will need to turn to low and stir once in a while so soup does not scorch. If cooking on the stove top soup could be ready in 3-4 hours. Make sure peas have completely gone to mush. Soup will be thick.
  5. Once soup is fully done you can add the hot milk and stir well to incorporate. This is optional. 
Serves 4

Grilled Raspberry Quesadillas

Summer meals are often cooked on the BBQ and here's a dessert to throw on the grill while it's still warm.  A filling of fresh raspberries, cream cheese and chocolate morsels sandwiched between two flour tortillas makes for a great grilled dessert.


  • 1/2 cup cream cheese, softened
  • 1/3 cup icing sugar
  • 1/2 teaspoon vanilla extract
  • 2 large flour tortillas
  • 1/4 cup milk chocolate morsels (optional)
  • 1 cup fresh raspberries
  1. Put the cream cheese, icing sugar, and vanilla in a mixing bowl and beat until smooth.
  2. Place a tortilla on a cutting board. 
  3. Spread half of the filling on the tortilla.
  4. Place raspberries evenly over cream cheese.
  5. Sprinkle chocolate chips over the filling.
  6. Spread remaining cream cheese mixture on other tortilla, and place (cream cheese down) on top of first tortilla to create a sandwich.
  7. Press down on tortilla sandwich gently. 
  8. Slide the quesadilla off the cutting board and onto the grill.
  9. Close the lid.
  10. Cook for about 3 minutes...then give the quesadilla a quarter turn.
  11. After several more minutes, carefully flip the entire quesadilla over. 
  12. Grill until somewhat browned and crispy with a hot, bubbly filling. 
  13. Slide onto cutting board and allow to cool for a minute or two before slicing.
  14. Serve with a scoop of ice-cream.
  15. Serves 2-4


Citrus Iced Tea


This is how my Mom made iced tea for us each summer.
It is simply made from ingredients we always have on hand.
I still make it using the same tools she did.  
I was lucky to find a juicer like hers and I still have some of the old aluminum ice cube trays which make ice so quickly compared to the modern plastic trays.

It is good to use a plastic or acrylic pitcher when preparing the iced tea - 
I still remember how I broke mom's favourite glass pitcher by 
pouring the hot tea over the cold ice.  

  • 6 cups boiling water
  • 3 tea bags - orange pekoe is best
  • 2 oranges 
  • 1 lemon
  • 1/2 - 3/4 cup sugar 
  • 25- 30 large ice cubes
  1. Using a 6 cup teapot pour boiling water over the tea bags and let steep for about 15 minutes.
  2. Meanwhile squeeze juice from oranges and lemon.  You will get more juice if the fruit is at room temperature. 
  3. Place juice in a 1 gallon pitcher - be sure it is plastic or acrylic.  (If you use a glass pitcher the hot tea over the ice may crack the glass)
  4. Add 1/2 cup sugar and the ice and stir well.
  5. Pour hot tea over the ice and juice, stirring to combine.
  6. Taste and add more sugar if desired.  I find 3/4 cup sugar is about the right sweetness for us.
  7. Refrigerate until serving and pour over more ice if desired.


Oriental Chicken Salad

Every time I go to a popular restaurant I enjoy their Oriental Chicken Salad.  So I have tried to mimic several times and I think this time I achieved the taste that I was looking for.  This is a meal in one perfect for the summer evenings when you don't want to spend the day cooking.  You can use either chicken fingers or grill your favorite chicken to add to this salad.  This time I used store bought chicken fingers to put in the salad.  That is the way the restaurant serves it too.


Dressing:

  • 1 1/2 cup mayonnaise, regular or low fat
  • 1/2 cup of liquid honey
  • 1/4 cup of rice or white vinegar
  • 1 1/2 tablespoon of Dijon mustard
  • 1 1/2 teaspoons of Sesame Oil
  1. Whisk together in a bowl and let sit in the refrigerator for an hour to blend the flavors.  
  2. Any unused dressing will last in the fridge for several days.

Salad:
  • 1 small bag of Coleslaw mix
  • 1 small bag of Spinach or 1 head of Romaine lettuce, chopped
  • 1 bunch of green onions, sliced 
  • 1 red pepper, cut in thin strips
  • 1 yellow pepper, cut in thin strips
  • 6 carrots, grated
  • snow peas - optional
  • beans sprouts - optional
  • 1/4 cup of toasted almonds
  • desired amount of crispy chow mein noddles
  • Chicken fingers or 1 grilled chicken breast per person, sliced
Mix all the ingredients together, adding the almonds and chow mien noodles on the top.  Pass the dressing.  If you add the dressing and don't eat all the salad it will get soggy.  That way you can enjoy any leftovers for lunch the next day.  This makes a fairly large main course salad enough to serve 8-10 very good size potions.

Bread for the Journey

Two years ago the 10 of us girls met together for our first summit.
It was the first time we all met in person, and gathered around the table together.
Our story began when Lovella put out an invitation to submit a recipe to her personal blog.
At first it was just a fun way to share our favourite Mennonite and other family recipes.
Little did we know that God would soon turn our love for cooking and baking into a ministry.
It was around that table in August 2010 we celebrated God's leading and the gift of friendship.


This past week we gathered for our second summit...a 'sister reunion'.

We share a love of cooking and hospitality , but more importantly we all love Jesus. It's our faith in God that has given us unity and purpose as we use the gifts God has uniquely given to each one of us. 


We have become sisters....sisters in the Lord.

It's a joy to serve the Lord together and to be able to share our faith individually and as a group of women, through the ministry God has given us.

I heard a song some time ago called Women of Faith.
As I listened to the words it was like they had been written for us.

*****


Women of faith
United in God's love
Sisters in grace.
Looking to Jesus to lead us each day.
We are women,
women of faith.

We are bound in love for one another.
We share faith in God
and we're committed to each other.
We are sisters in Christ Jesus, desiring to serve.
Leaning on God's promises, standing on His word.


*****
(by Jamie Harvill, Steve Arterburn)

I Peter 4:9-10
Offer hospitality to one another without grumbling. Each one should use whatever gift he has received to serve others, faithfully administering God's grace in its various forms.


More Sharing Service

Lemon Marshmallow Fruit Dip


Looking for a fruit dip you can make a day ahead of your party. 
This tangy dip pairs beautifully with summer fruits.
  • ½ cup sugar
  • 1 teaspoon cornstarch
  • 2 egg yolks, beaten
  • Juice of 1 lemon and enough water to make 6 tablespoons
  • 1 tablespoon butter
  • 3 cups mini marshmallows


  1. In a small saucepan, mix sugar and cornstarch.
  2. Stir in lemon juice, egg yolks and water.
  3. Stir over medium heat until it is thick and bubbly.
  4. Add marshmallows and softened butter and stir until nearly melted.
  5. Cover surface with plastic wrap and  chill.

Salmon with Orange Honey Dijon Sauce


Ingredients:
  • 2 - 3 lb filleted salmon
  • 1 tablespoon olive oil
  • 2 tablespoons butter
  • 4 tablespoons honey Dijon dressing
  • 4 tablespoons frozen orange juice concentrate
  • 2 tablespoons Knorr Cream of asparagus soup mix
  • 4 - 8 tablespoons water
Method:
  1. Place salmon on parchment paper lined foil pan or doubled up heavy duty foil for safe cooking on the grill.
  2. Poke salmon with fork and brush with olive oil
  3. Cook in closed grill or in oven at 350° F - 400° F for 10 - 15 min
  4. In the meantime, mix the rest of the ingredients in a small saucepan and bring to boil, stirring.
  5. Coat partially cooked salmon with cooked sauce and continue grilling until done, about another 10 - 15 minutes, depending on thickness of fish.
  6. Serve with extra sauce.

Balsamic Chicken with Mushrooms


Isn't it crazy how innovation is often born out of desperation?   
A couple of weeks ago, we decided an hour or two before dinner to invite guests. 
I quickly thawed some chicken breasts
 but the decision of how to prepare them wasn't as easy to make.  
I came up with this idea as our guests were walking in the door.
In under an hour, dinner was on the table and everyone was happy!

  • 4 large boneless chicken breasts or thighs 
  • salt and pepper
  • 1 tablespoon olive oil
  • 2 tablespoons Balsamic Vinegar
  • 1 tablespoon chopped fresh rosemary (if you don't have fresh, use only 1 tsp. dried rosemary)
  • 1 pound fresh mushrooms, sliced
  • 1- 2 tablespoons butter
  • 1 tablespoon Balsamic vinegar (second amount)
  1. Cut each  chicken breast into 2 or 3 pieces.
  2. Place chicken pieces on a rack in a baking pan.
  3. Salt and pepper lightly on both sides.
  4. Mix olive oil, first amount of Balsamic vinegar and rosemary in a small bowl.
  5. Brush both sides of chicken with oil /balsamic mixture.
  6. Bake in preheated 350 degree oven for 20 minutes, turn chicken over and bake another 10-20 minutes or until juices run clear when pierced.
  7. During last 10 minutes of baking, melt butter in a frying pan and saute mushrooms until they begin to brown.
  8. Add Balsamic vinegar (second amount) and continue to cook until mushrooms are well browned and vinegar is absorbed.
  9. Place chicken on platter and top with mushrooms.
Note: Fresh rosemary works best and we found that if you cook this on the BBQ it is better to use indirect heat.
Serves 4-6 people.

Food Presentation


Don't be afraid to skip adding a dip. Fresh fruit stands tall on it's own.
Fruits and vegetables presented beautifully can become the centre piece for your table this summer.


Today the 10 of us girls have the rare treat of all being together.
We're going to a high tea.
Food presentation will be a treat for the eyes as well as delicious!


Donut Muffins


Donut muffins, they taste of cake donuts and muffins combined in one. They are good rolled in a sugar and cinnamon mixture or drizzled with a glaze while still warm, extra special if you do both.

Ingredients:
  • 1/3 cup butter
  • 2/3 cup brown sugar
  • 2 eggs
  • 1 teaspoon vanilla
  • 2 cups flour
  • 2 teaspoons baking powder
  • 1/2 teaspoon baking soda
  • 1/2 teaspoon salt
  • 1/2 teaspoon cinnamon
  • 3/4 cup buttermilk
Directions:
  1. In a medium size bowl cream butter and sugar until light and fluffy.
  2. Add eggs and vanilla and beat until well blended.
  3. Mix dry ingredients and add to the creamed mixture alternately with buttermilk and stir until combined.
  4. Spoon batter into a lightly greased muffin tin.
  5. Bake in a 425º oven for 16 minutes or until golden in color.
  6. Remove from oven, cool for approximately 2 or 3 minutes, just until you can handle them.
  7. Roll donuts in sugar/cinnamon mixture of 1/2 cup sugar and 1 tablespoon cinnamon. Or dip tops of muffins in melted butter and then into cinnamon/mixture or drizzle with a glaze.
  8. Yield: 12 muffins

Shirley's Shrimp Mold


Do you have a tupperware jello mold in your cupboard that you haven't used in sometime?
Pull it out...because this recipe is so different you need to try it and then enjoy the rave reviews that my friend Shirley received when she brought it to a party. Even the shrimp nay sayers who took just a sample came back for a another cracker and Shrimp Mold dip. 
If you don't have a gelatin mold, any bowl will work. ...just give it a spray of cooking spray and it should work just fine.

  • 1 can tomato soup
  • 1 packet dry gelatin
  • 2 tablespoons fresh lemon juice
  • 2 tablepoons chili sauce
  • dash HP sauce
  • 1 large minced celrey stalk
  • 1/4 cup minced onion
  • 1 cup mayonaise
  • 1 250 gram / 8 ounces cream cheese at room temperature
  • 1 pound small cooked shrimp
  1. Beat the cream cheese in a large mixing bowl until smooth and cream. Add the mayo and stir until smooth and set aside.
  2. Heat the soup on low and add the gelatine and then all the sauces and continue to heat on low until gelatine dissolves.  Cool slightly.
  3. Whisk into the cream cheese mixture and add celery and onion and shrimp.
  4. Pour into an mold sprayed with cooking spray and chill overnight or at least for 4 hours.
  5. Unmold and set on a serving plate as shown and serve with an assortment of crackers.

Bread For The Journey


This spring I spent some enjoyable time in a local garden greenhouse selecting my bedding plants. One of my selections was the beautiful Martha Washington geranium pictured above.
Given a choice of visiting a fragrant flower nursery or a 'somewhat less than fragrant'  garbage dump, I know the garden nursery is an easy choice , yet none of us can avoid the necessity of a garbage dump somewhere near where we live.  Gratefully, we put our garbage curbside, knowing the garbage truck will come  pick it up and take it away!

Some time ago a friend forwarded this thought provoking e-mail circular to me.
While some of you may have already read it, I want to share it with those who haven't.
Even for those of us who have seen it before , reading it again  to reaffirm  its attitude-changing perspective  is a good idea!


Law of the Garbage Truck

One day I hopped in a taxi and we took off for the airport.
We were driving in the right lane when suddenly a black car jumped out of a parking space 
right in front of us.
 My taxi driver slammed on his brakes, skidded, and missed the other car by just inches! 
The driver of the other car whipped his head around and started yelling at us.
 My taxi driver just smiled and waved at the guy. And I mean, he was really friendly.
So I asked, 'Why did you just do that? 
This guy almost ruined your car and sent us to the hospital!'

This is when my taxi driver taught me what I now call, 
'The Law of the Garbage Truck.'

He explained that many people are like garbage trucks. They run around full of garbage, full of frustration, full of anger, and full of disappointment.
As their garbage piles up, they need a place to dump it and sometimes they'll dump it on you. Don't take it personally.

Just smile, wave, wish them well, and move on. 
Don't take their garbage and spread it to other people at work, at home, or on the streets.

The bottom line is that successful people do not let garbage trucks take over their day.
 Life's too short to wake up in the morning with regrets, 
so 
 ... Love the people who treat you right.
 Pray for the ones who don't.
 Life is ten percent what you make it and  ninety percent how you take it!
 Have a blessed, garbage-free day!
***********
In Jesus' words, 
what should our over riding attitude be to  those we encounter in our day?      
"But if you love those who love you, what credit is that to you?  
For even sinners love those who love them. 
And if you do good to those who do good to you , 
what credit is that to you?  
For even sinners do the same.
Therefore , be merciful, just as your Father also is merciful!"       
Luke 6:32,33,36                                                                                                                     


Orange Ginger Pork


I love quick meals, and the less time I need the more I like it.  This meal can be done in 30 minutes.  While it is cooking, make a fresh crisp salad, steam your veggies, set the table (better yet have someone else set the table)  and voila, dinner is served!  Wish you could join us....it is yummy.
  • 2 pork tenderloins, cut in 1" cubes 
  • 1/4 cup sugar
  • 1/4 cup water
  • 1/4 cup rice vinegar
  • 1/4 cup soy sauce
  • 1/4 cup ketchup
  • 1 tablespoon of freshly grated ginger, or 1/2 teaspoon of ginger powder
  • 2 oranges juiced 
  • 1 tablespoon orange rind
  • 1 heaping tablespoon of cornstarch
  • 2-3 cloves of garlic, minced
  1. Brown the pork in a preheated skillet with a tablespoon of oil, in batches.
  2. Combine all the sauce ingredients, except the garlic.
  3. Pour the sauce of the browned meat, and cook until it has thickened.
  4. Add the minced garlic, simmer for 10-15 minutes.
  5. Serve over rice.

Butterscotch Brickle Bars


This is a recipe my mom made for her oldest granddaughter's baby shower back in 1974.

Cookie Layer:
  • 1-1/2 Cups sifted all purpose flour
  • 1/4 teaspoon salt
  • 1/2 Cup softened butter
  • 3/4 Cup firmly packed light brown sugar
Method:
  1. Heat oven to 375 degrees. 
  2. Grease a 13 X 9 inch pan lightly and dust lightly with flour. 
  3. Sift together flour and salt. 
  4. Cut in butter with pastry blender. 
  5. Add sugar and mix well. 
  6. Press dough evenly into the bottom of prepared pan. 
  7. Bake for 15 minutes. 
  8. Remove from oven and cool slightly.

While cookie layer is baking prepare butterscotch topping:
Butterscotch Topping:
  • 1- 6 ounce package of butterscotch chips
  • 1/4 cup light corn syrup
  • 2 Tablespoons shortening
  • 1 Tablespoon water
  • 1/4 teaspoon salt
  • 2 Cups coarsely chopped walnuts or pecans
Method:
  1. Combine all ingredients except nuts in a microwaveable bowl and heat at 30 second intervals on full power stirring well after each 30 second heating until smooth. 
  2. (It took me 3 - 30second intervals) 
  3. If you prefer you can do this step over a double boiler. 
  4. Stir in nuts. 
  5. Spoon mixture evenly over slightly cooled cookie layer. 
  6. Bake an additional 8 minutes. Remover pan to a wire rack. 
  7. Cool until slightly warm and then cut into 1-1/2 to 2 inch squares. 
  8. Cool completely before serving. 
  9. Makes 24-38 squares.


Bush Pies

Since it is the season to be camping...and eating outdoors...I'm sharing a family favorite dish that is meant to be cooked on the open fire.  A bush pie is basically a sandwich grilled inside a cast-iron pie iron (available where camping equipment is sold).   The base of the pie iron is rectangular with two long handles that can be latched together, and they are available in a single or double size. 
 

  • bush pie maker
  • loaf of sliced bread (2 slices per bush pie)
  • butter
  • main course bush pie fillings (these can include pizza sauce and toppings, meat, chili, cheese)
  • dessert bush pie fillings (pie filling, nutella, bananas, chocolate, mini-marshmallows, etc.)
  1. Spread the outside of two slices of bread generously with butter (or margarine)
  2. Lay the un-buttered side up and top with desired fillings.
  3. Place the bread (buttered side down) on open bush pie maker.
  4. Top with second slice of bread...buttered side to the outside.
  5. Close bush pie maker...sealing the pieces of bread together.
  6. Place over fire or in the coals.
  7. Turn pie-iron over after several minutes and grill second side.
  8. Pie is cooked when the bread is golden brown and filling is hot.
  9. Open the pie-maker and serve.
We were camping over the long weekend and tried out several kinds of dessert bush pies.  Though the one with cherry pie filling was quite tasty...the hands-down favorite was the smore bush pie (with nutella, banana slices, marshmallows and chocolate chips).  If you are looking for a fun camping food..for kids of all ages...try bush pies!

Lettuce Boats with Balsamic Drizzle

This is more of an idea than a recipe. 
Create an attractive side salad using a romaine leave as a boat to hold the ingredients.
Reducing balsamic vinegar leaves you with a syrupy drizzle. It's tasty and also a healthy alternative to regular salad dressings. There are many good balsamic vinegars to choose from. I like to have a variety of flavoured balsamic vinegars in my pantry...my favourites are fig and pear or blueberry. 

Ingredients - for 4 boats:
  • 1 fresh heart of romaine lettuce, this is the inside smaller leaves of the head of romaine
  • 1 cup finely chopped lettuce
  • 2 cups your choice fresh vegetable, chopped fine (cucumber, celery, radish, carrots, onions, avacado)
  • cherry tomatoes
  • feta or blue cheese, crumbled
  • 3/4 cup good quality balsamic vinegar
Method:
  1. Cut core off the end of the heat of romaine separating leaves. Wash, dry and place in a bag in fridge for at least an hour to get cold and crisp.
  2. Chop up your choice of salad ingredients and combine with the chopped lettuce.
  3. Pour balsamic vinegar into a small saucepan. Over medium, heat until it begins to bubble. Turn to low and allow balsamic vinegar to reduce to about 1/2. As it reduces it will become more of a light syrup.
  4. While balsamic is reducing, lay your chilled lettuce leaf boats on serving dish and fill with chopped salad ingredients, and top with tomotos and cheese of your choice.
  5. Drizzle warm balsamic reduction over salads and serve immediately.